Explore the elegance of summer French tip nail designs for 2024, perfect for any vacation. From short gel to almond shapes, these trendy and classy ideas cater to every style. Bright colors like hot pink and green hibiscus add vibrancy, while white manicures offer a simple, elegant look. The 2024 trends feature unique nail art and preppy tips, ensuring your nails stay chic and stylish.
Advertisement
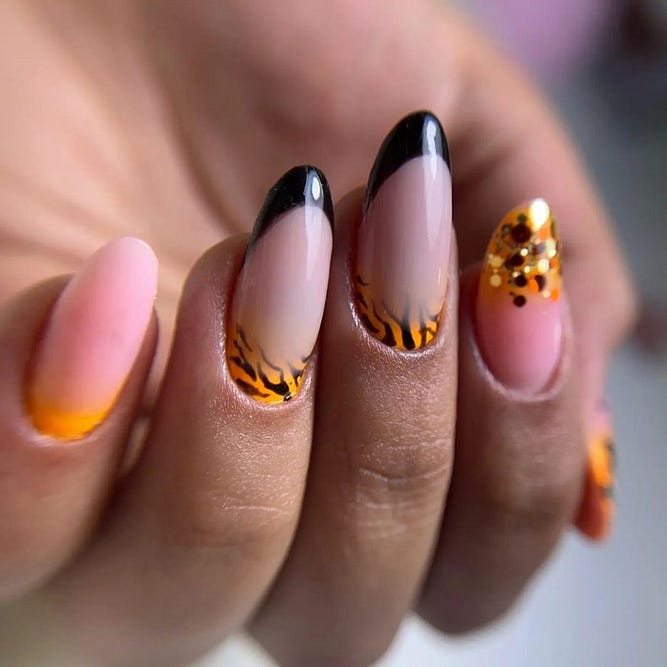
Artistic Flame French Tips
For those looking for something more artistic, flame French tips are a trendy and bold choice. The design features a mix of black and orange flames on a nude base, creating a fiery and dynamic look. Perfect for making a statement, this design is both edgy and stylish.
Advertisement
Consumables:
- Nude base polish: Deborah Lippmann Gel Lab Pro in “Naked”
- Black polish: OPI Nail Lacquer in “Black Onyx”
- Orange polish: Essie Nail Polish in “Meet Me At Sunset”
- Fine detail brush: Makartt Nail Art Brushes
Home Application:
- Start with a nude base.
- Use a fine detail brush to draw black and orange flame patterns on the tips.
- Let it dry and apply a top coat to protect the design.
Pink And Clear French Tips
This design is a modern take on the classic French tip, featuring a clear base with a bold hot pink tip. It’s a perfect blend of simplicity and vibrancy, making it ideal for a trendy and classy summer look.
Advertisement
Consumables:
- Clear base polish: OPI Natural Nail Base Coat
- Hot pink polish: Essie Nail Polish in “Watermelon”
- Top coat: Sally Hansen Miracle Gel Top Coat
Home Application:
- Apply a clear base coat.
- Paint the tips with hot pink polish.
- Finish with a top coat for extra shine and durability.
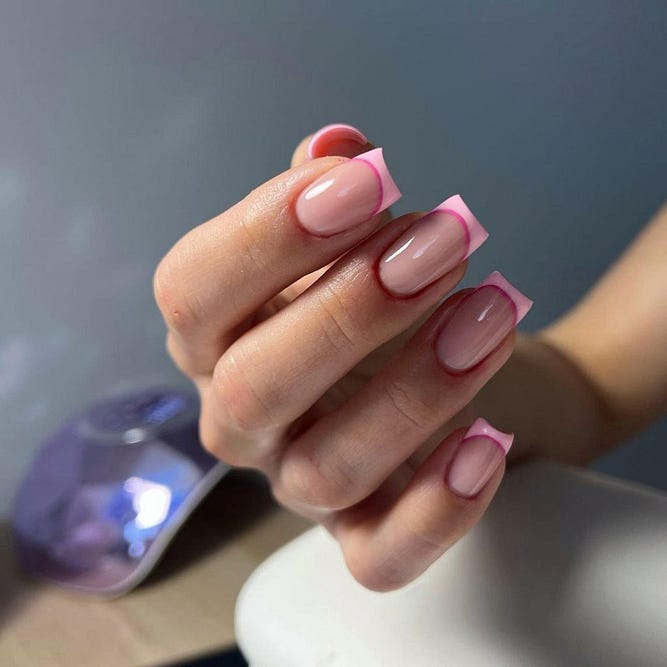
Vibrant Red French Tips With Pearls
This stunning design features bold red French tips adorned with delicate pearls. The combination of the vibrant red tips and the elegant pearls creates a striking contrast that exudes sophistication and class. The glossy finish enhances the overall look, making it perfect for both formal and casual settings.

Advertisement
Consumables:
- Red tip polish: OPI Nail Lacquer in “Big Apple Red”
- Base polish: Essie Nail Polish in “Ballet Slippers”
- Pearls: Nail Art Pearls from Born Pretty
- Top coat: Seche Vite Dry Fast Top Nail Coat
Home Application:
- Start with clean, shaped nails and apply a base coat.
- Paint the nails with a nude or light pink polish.
- Use French tip guides or a steady hand to apply the red tips.
- While the polish is still tacky, place pearls strategically on the nails.
- Finish with a top coat to secure the pearls and add shine.
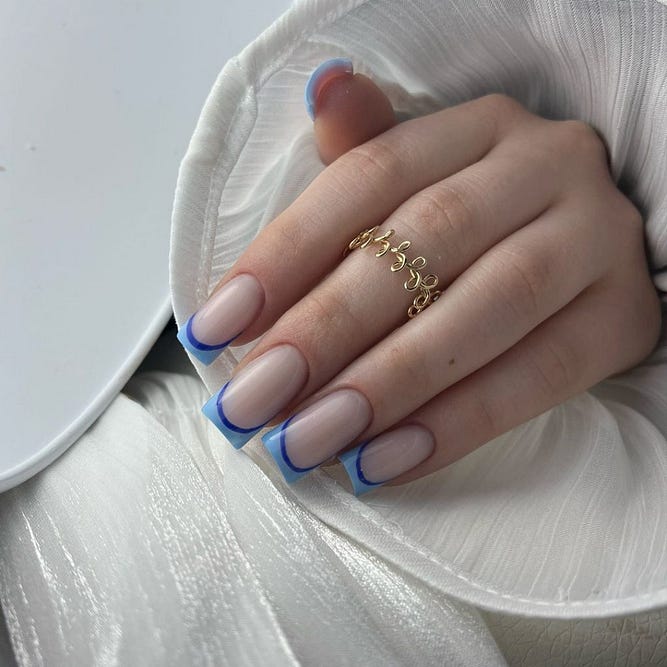
Blue French Tips With A Twist
For a refreshing twist on the classic French tip, these blue tips are both subtle and stylish. The soft nude base perfectly complements the bold blue tips, making this design versatile and suitable for any summer occasion.
Consumables:
- Blue tip polish: Essie Nail Polish in “Butler Please”
- Base polish: OPI Nail Lacquer in “Bubble Bath”
- Top coat: Sally Hansen Miracle Gel Top Coat
Home Application:
- Apply a base coat to protect your nails.
- Paint two coats of a nude or light pink polish.
- Use a fine brush or tip guides to create the blue tips.
- Finish with a top coat for a glossy finish.
Pink Ombre French Tips
This design combines the elegance of ombre with the timelessness of French tips. The gradient effect from pink to white creates a soft, romantic look that’s perfect for any occasion. It’s a beautiful and trendy choice for those who want something unique yet classy.

Consumables:
- Pink polish: OPI Nail Lacquer in “Mod About You”
- White polish: Essie Nail Polish in “Blanc”
- Makeup sponge for ombre effect
- Top coat: Orly Glosser Super High-Shine Topcoat
Home Application:
- Apply a base coat and let it dry.
- Use a makeup sponge to dab the pink polish onto the nails, creating a gradient effect.
- Apply the white polish to the tips using the sponge for a seamless blend.
- Seal with a top coat to smooth the surface and add shine.
Neon Green And Yellow French Tips
These neon French tips are perfect for adding a pop of color to your summer look. The combination of green and yellow creates a vibrant, eye-catching design that’s perfect for a fun summer break or vacay. The swirly patterns add an extra layer of creativity and uniqueness.

Consumables:
- Green polish: China Glaze Nail Lacquer in “I’m With The Lifeguard”
- Yellow polish: OPI Nail Lacquer in “I Just Can’t Cope-acabana”
- Fine detail brush: Makartt Nail Art Brushes
- Top coat: Essie Gel-Setter Top Coat
Home Application:
- Apply a base coat to clean, shaped nails.
- Use a fine detail brush to create the swirly patterns with the green and yellow polishes.
- Finish with a top coat to protect the design and add shine.
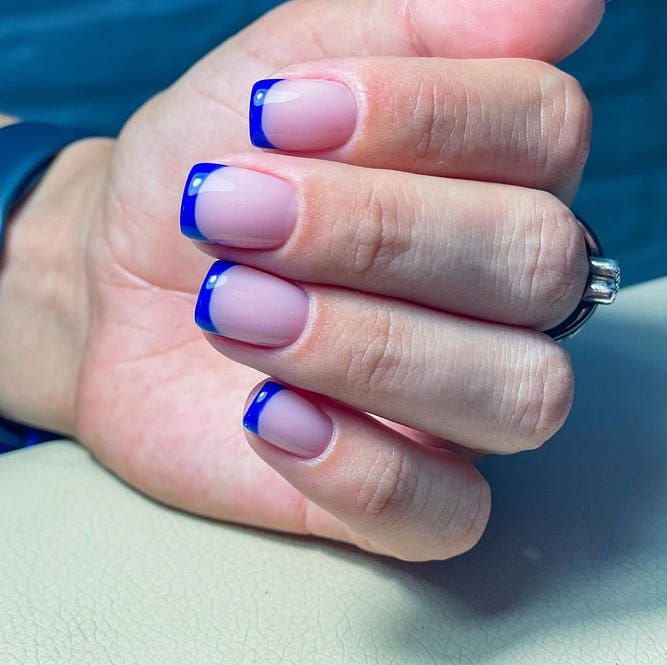
Bold Blue French Tips
For a simple yet bold look, these blue French tips are a great choice. The dark blue tips stand out against the nude base, creating a chic and modern look that’s perfect for any summer event. It’s a versatile design that works well with both casual and formal outfits.
Consumables:
- Blue tip polish: Essie Nail Polish in “Aruba Blue”
- Base polish: OPI Nail Lacquer in “Be There in a Prosecco”
- Top coat: Sally Hansen Insta-Dri Top Coat
Home Application:
- Start with a base coat to protect your nails.
- Apply two coats of a nude polish and let dry.
- Use a fine brush or French tip guides to apply the blue tips.
- Finish with a top coat for added shine and durability.
Peach And Glitter French Tips
This design features a delightful combination of peach and glitter, perfect for a vibrant summer look. The peach base is complemented by a glittery accent nail, adding a touch of sparkle to the overall design. It’s an ideal choice for those looking to incorporate some shimmer into their manicure.
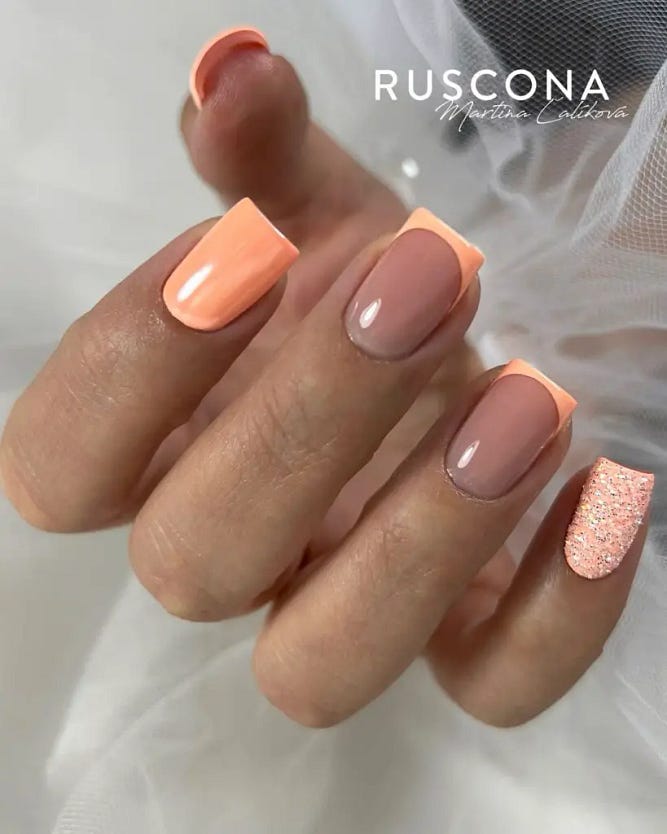
Consumables:
- Peach polish: Essie Nail Polish in “Peach Side Babe”
- Glitter polish: OPI Nail Lacquer in “Happy Anniversary”
- Top coat: Seche Vite Dry Fast Top Nail Coat
Home Application:
- Begin with a base coat to protect your nails.
- Apply two coats of the peach polish and let it dry.
- For the glitter accent nail, apply two coats of the glitter polish.
- Use a fine brush to apply the peach polish on the tips of the other nails.
- Finish with a top coat to seal the design and add shine.
Neon Yellow French Tips
Neon yellow French tips are perfect for making a bold statement. This design features a nude base with vibrant neon yellow tips, creating a striking contrast. It’s a trendy and eye-catching look that’s sure to turn heads.
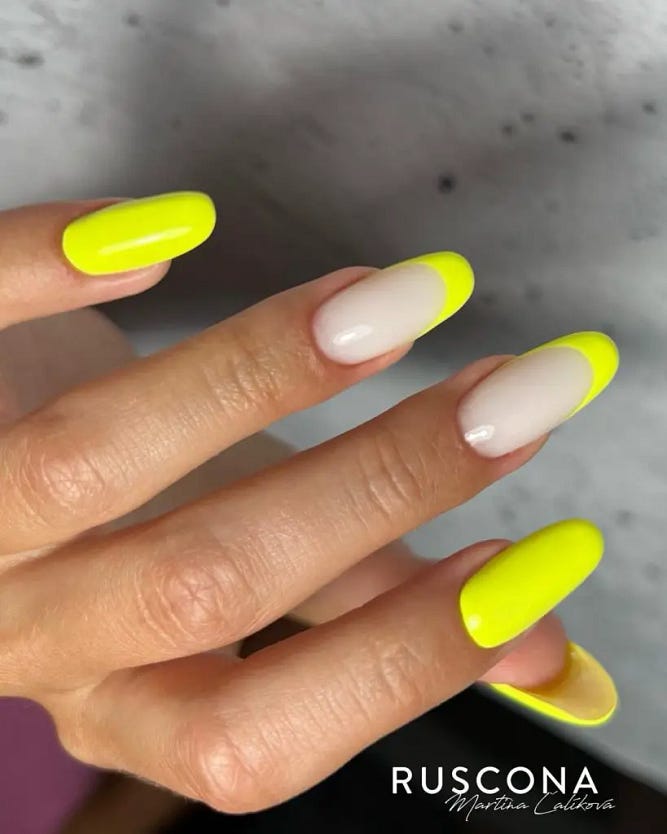
Consumables:
- Neon yellow polish: China Glaze Nail Lacquer in “Yellow Polka Dot Bikini”
- Base polish: Essie Nail Polish in “Ballet Slippers”
- Top coat: Sally Hansen Miracle Gel Top Coat
Home Application:
- Start with a base coat.
- Apply two coats of the nude polish and let it dry.
- Use French tip guides or a fine brush to apply the neon yellow tips.
- Seal the design with a top coat for a glossy finish.
Retro Orange And Blue French Tips
This retro-inspired design combines orange and blue in a playful and vibrant way. The orange tips are dotted with blue and white, creating a fun and lively look. It’s perfect for those who want to embrace a bold and colorful style.
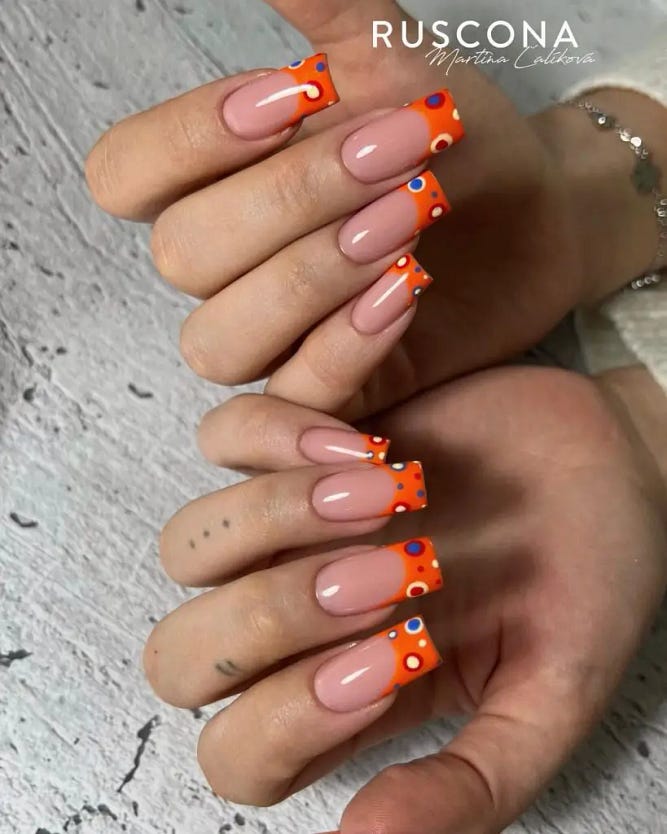
Consumables:
- Orange polish: Essie Nail Polish in “Tangerine Tease”
- Blue polish: OPI Nail Lacquer in “Rich Girls & Po-Boys”
- White polish: Essie Nail Polish in “Blanc”
- Dotting tool: Makartt Dotting Tools Set
- Top coat: Orly Glosser Super High-Shine Topcoat
Home Application:
- Apply a base coat.
- Paint the nails with a nude base and let dry.
- Use the dotting tool to create blue and white dots on the orange tips.
- Finish with a top coat to protect the design and add shine.
Black Almond French Tips
For a sophisticated and elegant look, black almond French tips are an excellent choice. The nude base contrasts beautifully with the black tips, creating a chic and timeless design. It’s a perfect option for a classy and refined manicure.

Consumables:
- Black polish: OPI Nail Lacquer in “Black Onyx”
- Base polish: Essie Nail Polish in “Mademoiselle”
- Top coat: Seche Vite Dry Fast Top Nail Coat
Home Application:
- Start with a base coat.
- Apply two coats of the nude polish and let it dry.
- Use a fine brush or French tip guides to apply the black tips.
- Seal with a top coat for a glossy finish.
Silver-Edged French Tips
This design features elegant pink French tips with a unique silver edge. The combination of soft pink and metallic silver creates a delicate yet striking look. It’s perfect for those who want a subtle yet stylish manicure.
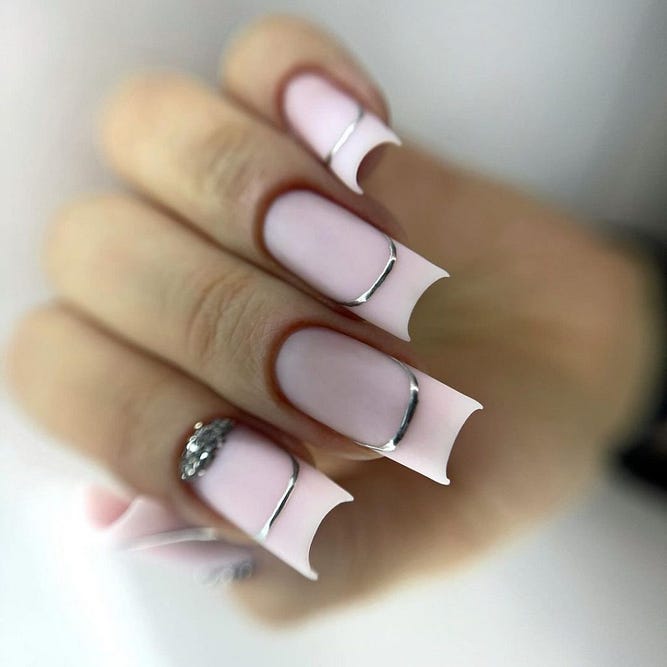
Consumables:
- Pink polish: OPI Nail Lacquer in “Pink-ing of You”
- Silver polish: Essie Nail Polish in “No Place Like Chrome”
- Top coat: Sally Hansen Insta-Dri Top Coat
Home Application:
- Apply a base coat to protect your nails.
- Paint the nails with a pink polish and let it dry.
- Use a fine brush to apply the silver edge on the tips.
- Finish with a top coat to seal the design and add shine.
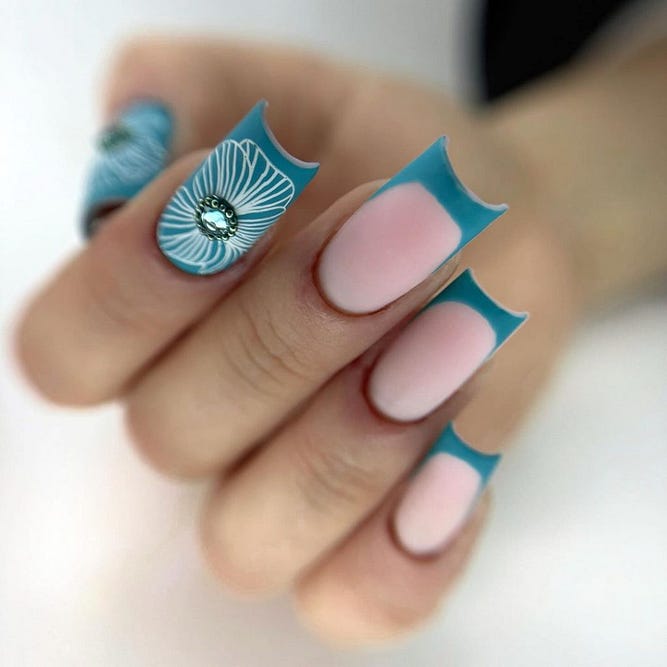
Blue Floral French Tips
This design combines the elegance of French tips with a delicate floral accent. The blue tips are complemented by a beautifully detailed white floral pattern on the ring finger, enhanced with a rhinestone at the center. This look is perfect for a chic and sophisticated summer style.
Consumables:
- Blue tip polish: Essie Nail Polish in “Butler Please”
- Base polish: OPI Nail Lacquer in “Bubble Bath”
- White nail art pen: Sally Hansen I Heart Nail Art Pen in White
- Rhinestones: Born Pretty Nail Art Rhinestones
- Top coat: Seche Vite Dry Fast Top Nail Coat
Home Application:
- Start with a base coat and apply the nude polish.
- Use a fine brush to paint the blue tips.
- Create the floral design using the white nail art pen on the ring finger.
- Place a rhinestone at the center of the flower while the polish is still wet.
- Finish with a top coat to secure the design and add shine.


0 Comments